High-Intensity Discharge (HID) bulbs have become increasingly popular in automotive lighting due to their superior brightness and longevity. However, like any other light bulb, HID bulbs eventually need to be replaced when they reach the end of their lifespan. If you're a car owner looking to replace HID bulbs, this step-by-step guide will walk you through the process.
Ensure your car's engine is off and the headlights are completely cool before starting the replacement process. This prevents any potential burns or electrical shocks.
Refer to your car's owner's manual for instructions and precautions for your particular make and model. The following steps provide a general guide.
Before you start, gather the required tools, including a replacement HID bulb, gloves, safety glasses, and a clean cloth. Some bulbs may require additional tools, such as a screwdriver or socket wrench, so refer to your manual to be prepared.
Step 1: Accessing the Bulb
The first step in replacing HID bulbs is to locate and access the bulb assembly. The bulb assembly is typically inside the engine bay, behind the headlight assembly. Here's how to access it:
Open the Hood:
Locate and release the hood latch inside your car. Then, lift the hood and secure it with the hood prop.
Locate the Bulb Assembly:
Once you have access to the headlight assembly, locate the bulb assembly at the rear of the headlight. It usually has a plastic or rubber cover.
Step 2: Removing the Old Bulb
Now that you have located the bulb assembly, it's time to remove the old HID bulb. Follow these steps to ensure a safe removal process:

Disconnect the Wiring Harness:
Carefully disconnect the wiring harness that is connected to the bulb assembly. Some bulbs have a lock or clip that needs to be released before disconnecting.
Remove the Bulb Retaining Clip:
Most HID bulbs have a retaining clip that holds them in place. Gently release the clip by pushing it away from the bulb or releasing any retaining tabs. Be cautious not to exert excessive force as it may damage the bulb or the assembly.
Remove the Bulb:
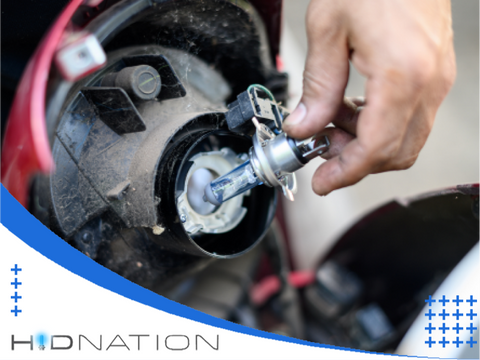
Once the retaining clip is released, carefully pull the old bulb out of the assembly. Avoid touching the bulb's glass surface with bare hands, as oils from your skin can reduce the bulb's lifespan or cause it to fail prematurely.
Step 3: Installing the New Bulb
With the old bulb removed, it's time to install the new HID bulb. Follow these steps to ensure a proper installation:

Insert the New Bulb:
Carefully insert the new HID bulb into the bulb assembly. Ensure that the bulb is inserted correctly and securely. As mentioned earlier, avoid touching the bulb's glass surface to maintain its longevity.
Reconnect the Wiring Harness:
Reconnect the wiring harness to the bulb assembly. Ensure a snug and secure connection to guarantee the proper functioning of the bulb.
Step 4: Testing the New Bulb
Follow these steps to verify the bulb's functionality:

Reconnect the Battery:
If you disconnected the battery during the replacement process, reconnect it now.
Turn on the Headlights:
Start your car's engine and turn on the headlights to check if the new HID bulb illuminates appropriately. Test both high and low beams to ensure both functions are working.
Check for Proper Alignment:
Observe the alignment of the headlights to ensure the new bulb is positioned correctly. Make adjustments using the headlight alignment screws, usually located near the headlight assembly.
Confirm Functionality:
Move your car to a suitable location and visually inspect the headlights from different angles to ensure proper brightness and beam pattern. If any issues persist, double-check the installation or consult a professional.
Step 5: Reassembling the Headlight Assembly
Once you have confirmed that the new HID bulb is working correctly, it's time to reassemble the headlight assembly. Follow these steps to complete the process:
Replace the Cover:
If you removed a plastic or rubber cover to access the bulb assembly, securely reattach it.
Reinstall the Headlight Assembly:
If you had to remove the headlight assembly, carefully reinstall it according to your owner's manual instructions. Ensure all screws, clips, or panels are appropriately secured.
Close the Hood:
Lower the hood of your car and ensure it is fully closed and latched.
Additional Tips and Precautions:
Use Quality Replacement Bulbs: Opt for reputable brands that offer high-quality products when purchasing replacement HID bulbs. This ensures optimal performance and longevity.
- Replace Bulbs in Pairs: It's advisable to replace both HID bulbs simultaneously, even if only one of them has failed. This helps maintain consistent lighting and prevents uneven brightness between the two headlights.
- Be Mindful of Ballast Connections: HID bulbs are typically connected to a ballast, which regulates the electrical current. When replacing the bulb, avoid disturbing or damaging the ballast connections.
- Avoid Touching Bulb Components: The HID bulb contains sensitive components, including the electrodes and the glass envelope. Avoid touching these parts as it can affect the bulb's performance and longevity.
- Consider Wearing Safety Glasses: While rare, there is a slight risk of bulb breakage during the replacement process. To protect your eyes from potential shattered glass, consider wearing safety glasses as an added precaution.
- Seek Professional Assistance if Needed: If you are unsure about any step in the process or encounter difficulties during the replacement, it's best to consult a professional mechanic or an automotive technician. You can Contact HID Nation to get professional help. They have the expertise and specialized tools to ensure a safe and proper bulb replacement.
Benefits of Replacing HID Bulbs:
- Improved Visibility: HID bulbs offer significantly brighter illumination than traditional halogen bulbs, enhancing your visibility on the road. This improved visibility contributes to safer driving, especially during nighttime or adverse weather conditions.
- Longevity: HID bulbs typically have a longer lifespan than halogen bulbs. Replacing your HID bulbs when necessary ensures consistent brightness and avoids sudden failures while driving.
- Energy Efficiency: HID bulbs consume less power than traditional halogen bulbs while providing higher brightness levels. This energy efficiency reduces strain on your car's electrical system and potentially better fuel economy.
- Enhanced Aesthetics: HID bulbs produce a crisp, white light often associated with a modern and stylish appearance. Upgrading your car's lighting to HID bulbs can give it a more sophisticated and appealing look.
Conclusion:
Replacing HID bulbs in your car can be simple if you follow the proper steps. Remember to prioritize safety, consult your car's owner's manual for specific instructions, and gather the necessary tools before beginning the process. You can successfully replace HID bulbs in your car by accessing the bulb, removing the old one, installing the new bulb, testing its functionality, and reassembling the headlight assembly. However, if you encounter any difficulties or are unsure about the process, it's always advisable to seek professional assistance to ensure your headlights' proper installation and functionality.
Read Also: How to Choose the Best LED or HID Headlights for Your Car?
FAQs
How do I reconnect the electrical connector?
Simply align the connector with the socket and firmly push them together until you hear a click. This ensures a secure electrical connection.
Should I replace both HID bulbs at the same time?
Replacing both HID bulbs simultaneously is recommended to maintain consistent lighting output and color temperature. If one bulb has failed, the other is likely nearing the end of its lifespan.
Can I use aftermarket HID bulbs?
Yes, you can use aftermarket HID bulbs as long as they are compatible with your car's electrical system and meet the specifications for your headlight assembly.
How do I test the new HID bulbs after installation?
Reconnect the car's battery, turn on the headlights, and verify that both new bulbs are functioning correctly. If any issues arise, retrace your steps and check for loose connections.


